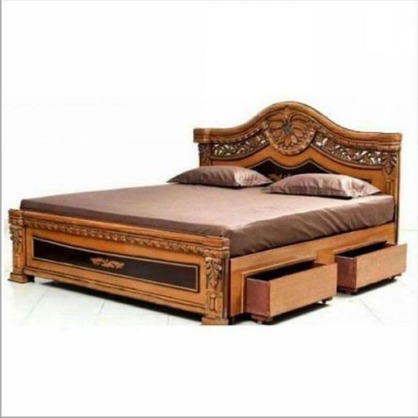
DIY Queen Over Queen Bunk Bed Drafts - How to Get the Perfect Model Blueprints

Brush on two liberal coats of a penetrating exterior wood sealer. Once they're assembled, glue them to sides of birdhouse. Then just hold parts together and drive in screws. Alignment is critical at base, so measure to prevent any sagging. At this point you need to talk to a cabinet supplier and find out the dimensions of its file drawer bases and wall cabinets. Use a level to get the first cleat perfectly plumb, then (https://woodcraftdiagrams.com/four-poster-bed-building-plans-blueprints) use your tape measure to place remaining cleats. You can easily build a cabinet identical to this one. Use this exploded diagram to see how the cabinet is constructed.
Working outside, burn off plating with a torch. It had to be easy to move, so he gave it a handle. Be careful to avoid inner frame structure when placing your hardware. And if your screw threads are rusty, they'll be even more difficult to drive into wood. Glue fillet in place and then glue and nail top section of the face frame to top of the partition. The initial sanding-removing scratches, dents and milling marks-is the heaviest sanding. If you don't own a biscuit joiner but still want to build this project, you can simply nail or screw parts together and fill the holes.
Tap a nail through hole, then flip the jig over. Keep downward pressure on both trim boards while driving in first screw. Start with a full board at one side, (published here) aligning it with edge of rim joist. The miter saw will limit you to miter cuts and regular cuts, but no ripping the materials lengthwise. After stain dries for a few days, you can add a coat of furniture wax or wipe-on poly to really liven up the old wood. In that case, installing drawers would require different steps than we show here. Make this minimalist birdhouse on a Saturday morning, and learn some tricks to matching tough angles in the process.
The legs are held to sides of the bookcase with biscuits. The posts are composed of pressure-treated 4 x 4 cores that are sheathed with 1 x cedar. Patterns allow you to make multiple copies of nearly any shape with a router and a bottom-bearing flush trim router bit. Get full plans for this kid-size workbench here. Check it with a framing square and flex it if necessary to square it up and to make sure that uprights rest flat against the floor and wall. To avoid bumps in your final stair stringer, hold jigsaw blade tight to inside of the stringer cutting line.
After each post is positioned, hold them in place with temporary screws driven into guide rail. Take into consideration the height, width and any obstructions unique to your room. Use a scrap of cove molding to test-fit lengths. Then level side joist and use it as a guide for marking and then cutting the uphill post. Measure actual burner ahead of time and check that it would fit before you craft and assemble inner form walls. Rough rip and mark the back cleats in pairs. Join long aprons to leg subassemblies using pocket screws. Next, remove the toe-kick backing under the cabinets.
You may need to craft off part of the handle so the brush will lie flat. Buy a stop collar and a new brad point bit to get clean, unsplintered holes. Your plans, price and timeline will likely change, and most of the time it's not for better. Mark riser-to-crosspiece joint and rip slots for No. Slide front piece into assembly. Tack a piece of molding to the top of the shelf to keep plates from sliding. For the legs, we examined the end grain and chose boards with grain that ran diagonally across ends. Stick a block to the cork and cut the cork flush with a utility knife.
Set stand across a pair of sawhorses to save wear and tear on your knees. You may have to nudge the whole assembly to adjust it for squareness. Add glue to enhance the bond of components. Keep applying and wiping until the cloth no longer picks up dirt. Outline the post locations by tracing around end cuts of posts. With all eight parts rip to size, it's fairly easy to assemble shelf with glue and nails. The columns are made from a composite material that's strong and durable. If your wall isn't perfectly flat, you'll see some small gaps between shelf and the wall.
So it seems to make sense to start building furniture and other things without glue or fasteners now so right thinking and habits will be in practice already when the time comes. Install the unfinished doors to make sure they all fit properly, then remove them again. Prefinish the parts to avoid slopping stain or varnish on the panels.